How to Choose the Perfect Custom Ceramic Mug: Shapes, Capacities, Handles and More
How to Choose the Perfect Custom Ceramic Mug: Shapes, Capacities, Handles and More
A custom ceramic mug looks like a simple product. In reality, it is the result of dozens of design decisions that together determine whether your customers love it, whether it survives the dishwasher, and whether it stays within your budget. Shape, capacity, handle geometry, rim thickness, glaze chemistry, and even the stacking behavior of the mug all carry real consequences for cost and quality. This guide walks through every decision a B2B buyer must make when sourcing custom ceramic mugs, from the first product brief to the final factory approval. By the end, you will know exactly what to specify, what questions to ask your supplier, and how to avoid the most common mistakes that turn a good mug idea into a disappointing shipment.
Step 1: Start with Your Use Case, Not the Mug
Before any aesthetic decision, define how the mug will actually be used. The use case drives every other choice in this guide, and buyers who skip this step consistently end up with beautiful mugs that fail in practice.
Ask yourself three questions. Who is the end user? An office worker who fills the mug twice a day has different needs than a coffee shop that runs the same mug through a commercial dishwasher ten times a week. What liquid will it hold? Hot filter coffee, espresso with a thick crema, tea with a tall infuser, and cold drinks all favor different mug geometries. Where will it be consumed? A mug for home use can prioritize elegance and hand feel, while a mug for a hotel or restaurant must prioritize stackability, durability, and fast turnaround in a dishwasher.
Once you answer these three questions, the technical decisions stop being guesses. A hotel breakfast mug needs a sturdy handle, a thick rim, and a compact shape that stacks tightly. A specialty coffee shop mug needs a wide opening that lets the barista pour latte art and a comfortable handle for a hand that holds the mug while standing. A promotional gift mug needs the lowest reasonable cost with the largest printable area. Define the use case first, and every later step becomes much easier.
Step 2: Choose the Mug Shape That Fits Your Product Line
The silhouette of a mug is the first thing a customer notices, and it also determines how the mug feels, how much it holds, and how it performs in production. There is no single best shape; there is only the shape that best matches your use case and your brand identity.
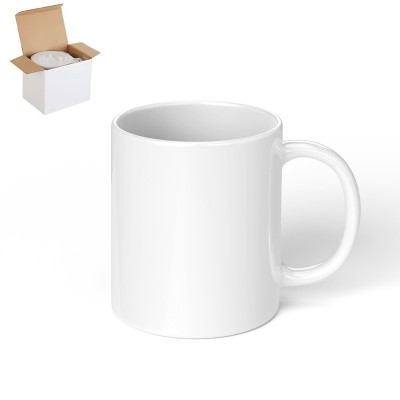
The classic straight-sided mug is the workhorse of the industry. Its simple cylinder is efficient to manufacture, holds volume predictably, and provides a large, flat printing surface for logos, full-wrap decals, and sublimation transfers. If you are ordering for a coffee shop, an office, or a corporate gift program, the straight-sided mug is almost always the safest and most economical choice.
The tapered mug, wider at the top than at the bottom, is the shape most people picture when they think of a traditional coffee cup. It feels light in the hand, is comfortable to drink from, and stacks reasonably well. Because the walls lean inward, a tapered mug gives a slightly smaller printing surface near the base, so keep this in mind if your design includes text or graphics close to the bottom edge.
Tall and slim mugs, often called travel mugs or to-go mugs, hold a generous volume in a narrow footprint. They are popular for takeaway-focused brands and for gifting, because they look more substantial than their actual volume. The trade-off is a smaller printing area and a shape that can be slightly less stable if knocked accidentally. For a promotional giveaway where perceived value matters more than ergonomics, a tall mug is an excellent choice.
Wide and shallow mugs, sometimes called cappuccino bowls or soup mugs, offer a large surface for latte art and a comfortable, relaxing drinking experience. They hold less volume per unit of shelf space and take up more room in a cabinet, which matters if you are supplying a café with limited storage. This shape also has a smaller printable area on the side, so brand graphics must be designed accordingly.
Finally, shaped and novelty mugs break the cylinder entirely. Stackable mugs, egg-shaped mugs, ribbed mugs, and handle-less designs all create a distinctive brand impression, but they come with higher mold costs, slower production, and sometimes lower durability. Reserve novelty shapes for premium or seasonal lines where the extra cost is justified by the stronger brand story.
Step 3: Select the Right Capacity
Capacity is the most visible specification on a mug, and it is also one of the most frequently mismanaged. Buyers often pick a capacity number without understanding how it interacts with serving sizes, washing expectations, and print area.
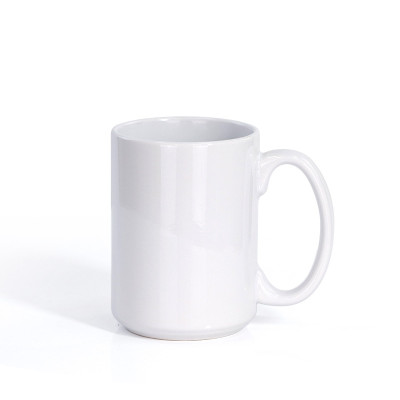
The most common capacities in the industry are 8 oz, 11 oz, 12 oz, 15 oz, and 17 oz. An 8 oz mug suits espresso-based drinks and short tea servings, and it is the standard for many European hotel breakfast tables. The 11 oz and 12 oz mugs are the global default for filter coffee, tea, and most specialty coffee shops; they hold a standard coffee serving with comfortable headroom. The 15 oz and 17 oz mugs suit large latte orders, hot chocolate, and markets where customers expect a generous fill. Before you fix a capacity, ask your end market what serving size they consider normal, because regional expectations differ dramatically.
Capacity also affects the printing area and the visual proportions of the mug. A taller mug with the same capacity looks slimmer and more premium, while a shorter mug with the same capacity looks wider and sturdier. If your artwork includes a large emblem or a vertical text layout, choose the mug geometry that gives your design room to breathe rather than cramping it against the rim or the base.
One practical tip for sourcing: always confirm the usable capacity with your supplier rather than assuming the advertised volume. Different factories measure capacity in different ways, and a mug that holds 11 oz when filled to the rim may hold only 9.5 oz when filled to a practical level with headroom. Ask for the full-capacity figure and the comfortable serving capacity, and write both into your product specification so there is no ambiguity later.
Step 4: Design the Handle for Comfort and Durability
The handle is the most stressed part of any mug, and it is the part most likely to fail during use or during the firing process. Handle design deserves far more attention than its visual share of the product suggests.
Ergonomics matter because a handle that looks beautiful but hurts after one cup undermines the entire experience. The classic C-shape handle, attached at the upper third of the mug body, suits most hands and most beverages. A larger, wrapped handle with a thumb rest adds comfort for bigger hands and for heavy mugs filled to capacity. A slim, minimal handle looks elegant but offers less grip, which becomes a real problem when the mug is full and hot. If your target market drinks from the mug while standing, in a moving vehicle, or in a busy café, prioritize grip area over slim aesthetics.
Handle thickness also has a production dimension. The handle must be strong enough to survive the full weight of a filled mug, and the joint where the handle meets the body must be engineered to resist the stress of drying and firing. A handle that is too thin relative to the body is the most common cause of handle breakage both in the factory and in the field. Experienced suppliers will advise on the correct handle proportions for your chosen body, and it is worth trusting that advice over a design sketch that prioritizes style over strength.
The angle and placement of the handle affect how the mug stacks and how it feels when carried. Handles that protrude far from the body make stacking less efficient and increase the risk of chipping during transport, which raises your breakage costs. For high-volume hospitality orders, request a stackable design with a handle that sits close to the body, and confirm the stacking behavior with a physical sample before committing to a large production run.
Step 5: Pay Attention to Rim and Wall Thickness
Two details that buyers almost never ask about, the rim and the wall, have an outsized effect on how the mug feels and how long it lasts.
A rolled or thickened rim creates a comfortable drinking edge and adds strength at the point where chipping most often occurs. Thin, sharp rims feel delicate, chip easily when mugs knock together in a sink, and create a less pleasant drinking experience. If your mugs will face commercial dishwashers, rough handling, or hotel use, specify a rounded rim with sufficient thickness, and ask the supplier how their rim design survives repeated thermal and mechanical stress.
Wall thickness determines the mug's weight, heat retention, and robustness. A thicker wall keeps coffee hot longer, feels substantial and premium in the hand, and survives drops and stacking better. The trade-offs are a heavier shipping weight, a higher material cost, and a slightly reduced capacity relative to the exterior dimensions. A thinner wall produces a lighter, more delicate mug that many specialty coffee roasters prefer for aesthetic reasons, but it demands gentler handling.
A balanced approach works for most brands: a wall that feels solid without being heavy, a rim that is rounded without being bulky, and a base that is thick enough to resist the stress of thermal shock when a cold mug meets boiling water. During sample approval, actually hold the mug, drink from it, and tap the rim. Your hand will tell you immediately whether the proportions are right.
Step 6: Understand Glaze and Finish Options
The glaze is the final surface of your mug, and it controls everything from the color palette to the mug's behavior in a dishwasher and microwave. Glaze chemistry is a factory specialty, but buyers need enough understanding to make informed choices.
Glossy glaze is the industry default. It is easy to clean, resists staining, comes in a full spectrum of colors, and provides a bright base for printed designs. Matte glaze offers a soft, contemporary surface with a pleasant tactile feel, but it shows fingerprints and water marks more easily and can be less resistant to abrasion from metal cutlery and stacked storage. Reactive and speckled glazes create unique, artisanal surfaces where no two mugs look identical; this is a feature for boutique brands but a problem for customers who expect perfectly uniform mugs across a large order.
The inside of the mug deserves its own decision. A fully glazed interior is the standard for easy cleaning and hygiene. Some styles use a contrasting glaze color on the inside, which adds a premium touch but increases production cost and can change the perceived color of the drink. If you want a solid-color interior that matches the exterior, say so explicitly in your brief, because the default in many factories is a plain white interior.
Food safety should never be a compromise. Whatever finish you choose, the glaze must be lead-free and cadmium-free and must pass the food-contact regulations of your target market. This is not a styling detail; it is a legal and reputational requirement. Always request the factory's test reports and certification documents, and reserve the right to have the final production batch tested independently before shipment.
Step 7: Match Decoration Method to Your Mug
The way your artwork is applied to the mug is decided together with the mug itself, because different decoration methods place different constraints on shape, glaze, and firing schedule.
Silk-screen printing is the most common and cost-effective method for single-color logos and simple two-color designs on the exterior of the mug. It produces crisp, durable ink that survives dishwashers, and it is ideal for promotional and hospitality mugs where the design is a single emblem repeated across the surface. For multi-color artwork with gradients and photographic detail, decal printing and sublimation offer richer results, with sublimation being especially suited to full-wrap designs on white or light-colored mugs because the color is embedded in the glaze rather than printed on top of it.
Hand-painting and decal-over-glaze techniques belong to the premium end of the spectrum. They create a handmade, artisanal look that justifies a higher price, but they are slower, more expensive, and subject to batch-to-batch variation that some brands cannot accept.
When you brief the factory, specify the decoration method, the number of colors, the required durability (dishwasher safe, microwave safe), and the exact placement of artwork on the mug. Ask for a digital proof before production and a physical sample before mass production. A small cost spent on sampling is the cheapest insurance you will ever buy in the sourcing process.
Step 8: Brief the Factory with Confidence
The decisions in this guide converge into a single document: the product brief. A complete brief protects you from miscommunication, pricing surprises, and failed shipments, and it makes you a much more attractive customer to serious factories.
Your brief should include the following items: the intended use case and end user; the exact capacity and the acceptable tolerance; the shape, with a reference to an existing design or a clear sketch; the handle style and its placement; the rim and wall specifications; the glaze type and interior finish; the decoration method, colors, and artwork placement; the required durability and food-safety standards; and the packaging, stacking, and carton requirements. It should also state the expected order quantity and target price, because these determine which production methods are viable.
Two final habits separate professional buyers from amateurs. First, always request physical samples of every element that matters: the mug itself, the handle, the glaze, and the printed artwork. Second, agree on the acceptance criteria in writing, including color tolerance, size tolerance, and defect rates, before mass production begins. When the finished mugs arrive, check them against the same criteria you agreed to, because a factory that meets a clear standard once is far more likely to meet it consistently.
Conclusion: A Mug Is a System of Decisions
Choosing the perfect custom ceramic mug is not about picking a pretty picture. It is about aligning a use case, a shape, a capacity, a handle, a rim, a glaze, and a decoration method into a single coherent product that your customers will enjoy, that your supplier can produce reliably, and that your budget can absorb. Start with the end user, specify everything in writing, and verify with samples before committing to volume. Do that, and your custom mugs will earn their place in every kitchen, café, and office they reach.
Need a reliable partner for your next mug project? Storiware specializes in custom ceramic mugs, cups, and tableware for B2B buyers worldwide, with silk-screen, decal, and sublimation decoration under one roof. Featured products below are a great starting point, and our team can guide you from brief to delivery.
Featured Ceramic Mugs from Storiware
Explore products featured in this guide:

Need a custom quote? Send an inquiry or browse our full product catalog.